Ableton Live 10 Drum Tips
Programming drums can be a tricky and complex process but we're here to offer some advice and clarity. By downloading our Free Ableton Drum Racks session plus reading the article below you should be able to create incredible drums that swing, groove and punch in equal measures.
Free Ableton Drum Racks session - Included in this is a session which holds 2 drum racks. Each is labelled allowing you to drop in your own sounds and easily create the tips that we discuss below. You can download the FREE Ableton session HERE
Drag out samples to create new drum racks
When creating your drums it can be easy to just keep adding and adding new samples to the same drum rack over and over again. This is great for speed but when it comes to mixing the sounds it can get a little tricky. Here's how to effortlessly divide your drums down into individual tracks.
- Create new MIDI channel
- Drag the sample from the current drum rack to the new MIDI channel. This will automatically create a new rack with the MIDI notes from your previous work all in tact allowing you to easily separate the elements down into Kicks, Snares & hats etc.

Create Sends & Returns
Create send and return effects within your drum rack. Steps:
1 – Turn on the send and return option (S & R) at the bottom of your drum rack.
2 – Drag your plug in of choice to the ‘drag audio effects’ section.
3 – You can now turn up the send option within the drum rack to send to your effect of choice.
4 – This can be done with multiple effects and processors.

Wet / Dry Within FX Rack for parallel compression
Many ‘vintage style’ compressors like an 1176 don’t include a wet dry mix which can be frustrating when looking to parallel compressor your drums. Well worry not. Inside our channel you can create an ‘audio FX rack’ which allows us to dial in our own Wet/Dry Mix. This technique can be incredibly useful for all effects lacking a wet\dry including chorus, flange or saturation.

Velocity Tool for live hats
The MIDI velocity tool is great for adding that live feel to your hat patterns. Here’s what you’ll need to set:
Out Hi – The loudest velocity that will be played by any MIDI note
Out Low – The quietest MIDI note that shall be played.
Random – This randomises the velocities within the ‘Out Hi’ and ‘Out Low’ settings. Increase this dial for even more variation.

Swing Settings
An often-overlooked option is the MIDI Swing setting. This allows the notes to be randomly moved off grid by a set amount adding even more of a ‘live feel’ to your beats.
Note: If layering kick drums be careful of this as it can easily move change the timing of your hits which can cause phase issues and flaming.
Noise Build Hats
As with the classic drum machines like 909 and 808 it was pretty easy to open up the decay of a sound showcasing movement and progress within your track. Well we can do something similar by increasing a layer of noise that’s triggered by our or sample of choice. Here’s how to do it:
1 – Right click on your ‘simpler’ and choose ‘simpler>sampler’.
2 – Navigate to ‘Pitch/OSC’ – This is our synth section within the sampler. It’s allows us to play notes or noise at the same time as the drum hit.
3 – Under ‘Type’ choose noise.
4 – Slowly increase the volume section to reveal the sound of the noise when the track is playing. This is automatable as well so can be increased for builds and drops in your track.
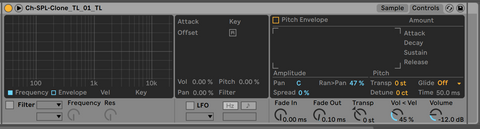
Random Panning
This cool little feature allows you to move your hats or percussion hits around the stereo image without automating or adding a pan tool. Nestled inside the ‘controls’ section of your Simpler you’ll find the random pan dial. Increase this to add more width and movement within that chosen sample.
Phase on Kicks
An often over looked technique but one always worth checking. Try adding the utility tool to your kick sample and ‘flip the phase’. Getting your hits to sync up can be the difference between a great and a terrible kick. For more info on this and great kick techniques check our ‘Building the Perfect Kick’ blog article.
Saturator on aux for extra grit
Try adding a Saturator plug-in to an Aux channel. Individual elements like the kick & snare can then be sent to this for extra grit and saturation.
Note: It's often advised to add an EQ after the saturator to control the bottom end. You'll notice in the Ableton session included that we high passed the Saturator channel at 115Hz to control said issues.
Download the FREE Ableton Drum Racks session HERE and explore our in depth Ableton Live Sample Packs
The Touch Loops team